

Today I want to show you a small photo step by step kinda tutorial of an oil painting. At the time where I have started this painting I was sick of quick drying paints like acrylics. I wanted to paint in a more relaxed way. I decided to get my oils out of my drawer and give them an other try.
I used these materials:
- A size A4 MDF board from the hardware store. They have cutted it for free into this size.
- Acrylic gesso, I used white gesso from Schmincke. But I believe any brand will work.
- Oil paints Norma from Schmincke, these are higher quality paints. I believe that life is too short to be annoyed with cheap paints. And if you know how to mix colors and tones then you don’t need to buy every tube.
- Medium L from Schmincke. It is like Liquin from Windsor & Newton. It thinned your paint and it shorten the drying time. And it is odorless
- Nail polish remover to get the main paint out of my brushes (Edit: you can just use water and soap)
- Paper towels to wipe my brushes
- School quality brushes from Da Vinci.

But lets start with the first photo, the reference photo. I got this photo from Pixabay. Every photo in this blog is clickable. That means if you click on a photo you get a bigger size in a new tab.

At first I sketched some rough lines only for my orientation.

As you can see I painted at first the sky. I painted in very thin layers. For oil paints, it is important to paint thick layers over thin layers to prevent cracking of the paint. For the sky I mixed titanium white with ultramarine blue and medium L.

The sky is ready and I start to paint the back sea. My brushstrokes are wavy from the beginning. This creates a nice texture.

This photo contains 3 layers of ocean. The back sea is alread blocked in with a dark paint and in front of this there comes a middle wave and a front wave. The middle wave is slightly darker at the front. Here I use the same tone as the back sea.
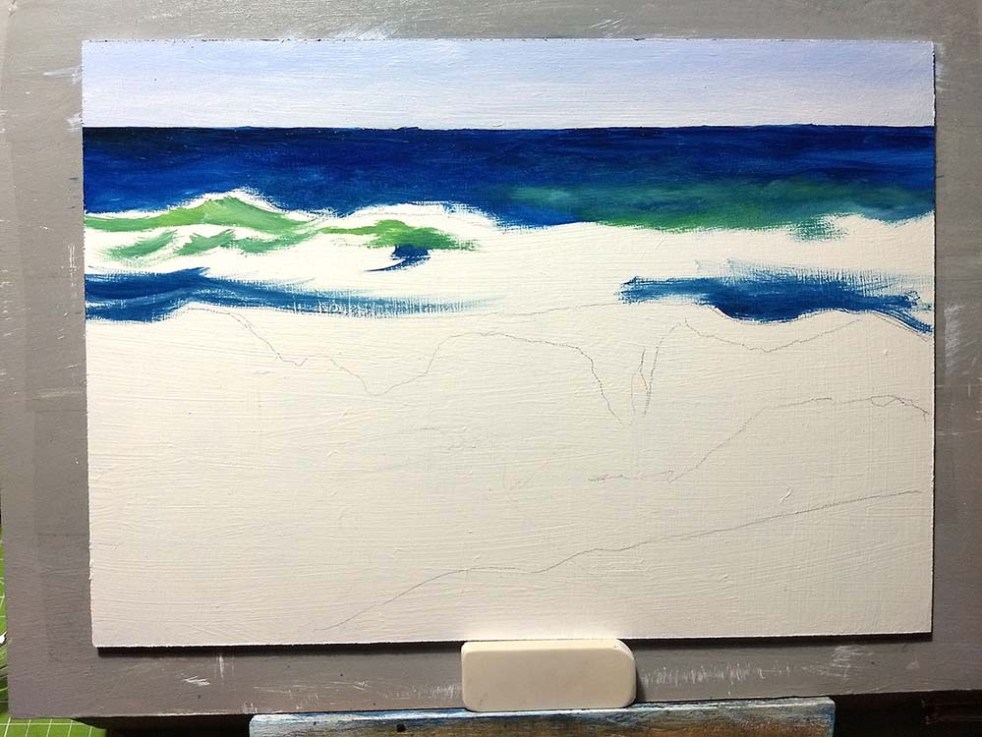
To get the translucent look of a wave I add some yellow for a greener tone. In the sea there are seaweed and if the sun shines through, you can see it.


At this stage I decided that it would be better to firstly block in all the main colors and let it dry over night. In all my paints I always mixed in some medium L for smaller drying time.

Titanium white has the slowest drying time. I let all the areas free where I will add white at the end. This helpes me also for a better orientation.

Now all the basic colors from the sea are blocked in. You can still see my brushstrokes. I applied it very thin because I just want to cover the white.

The rocky beach in the foreground has also get his basic colors. Now it is time to wait a night for drying.

It’s the next day and the first thing I have done is to darken the middle area of the front wave. This smoothen out my brushstrokes and creates more depth into the wave.

I have now painted some dark foam under the overlapping wave.

The next step was to darken the rocky beach and hiding every bit of white with a greyish brown tone.

Because the beach is not my planned focal point I start to add the foam with a muddy white.

The rocky beach is now covered with spray and foam and I am ready to do the magic on the waves. I added some light spots on the middle wave and start to paint the foam on the front wave and the spray on top.

In the next step, I painted the high-splashing water behind the rock. To get a rich value I have to darken the water behind it.

And this is the finished painting. I added more foam and spray. I added highlights and shadows in the foam of overlapping wave. This creates a really natural look. All the white I added at the end is pure without any medium. I believe it has to dry 1-2 weeks.
I hope you enjoyed this little photo step by step thing. See you next time.
Bye
Annett